Monday, July 26, 2010

Send Mail Task in SSIS 2008

How to send a notification/mail to specific group of peoples through SSIS packages? Thanks to Send Mail Task. This can be achieved easily using send mail task.
By using the Send Mail task, a package can send messages if tasks in the package workflow succeed or fail, or send messages in response to an event that the package raises at run time. For example, the task can notify a database administrator about the success or failure of the Backup Database task.

You can configure the Send Mail task in the following ways:
  • Write the message text for the e-mail.
  • Write a subject line for the e-mail message.
  • Set the priority level of the message. The task supports three priority levels: normal, low, and high.
  • Specify the recipients on the To, Cc, and Bcc lines. If the task specifies multiple recipients, they are separated by semicolons.
I'll explain this by an example:

STEP 1:
Create a new SSIS Package and rename it with SendMailTask.dtsx.

STEP 2:
Add two package variable MessageSource and SMTPServer of type string to this package as shown below:
STEP 3:
Add a new SMTP Connection manager and configure its properties. Enter SMTP Connection manager in Name and Connection for sending mails in Description boxes. Now enter your SMTPServerName in SMTP server box as shown below:


Set SmtpServer property of above connection manager with variable User::SMTPServer by clicking on Expression in properties of SMTP Connection Manager. This is highlighted in below snap shot:


STEP 4:
Drag and drop Script Task to set your message. Double click on Script Task to open Script Task Editor, Select User::MessageSource as ReadWriteVariables and click on Edit Script... button to set the message. Write below code in main function. (This is for VB.NET, you can choose C# or VB.NET)

Public Sub Main()
   'Set MessageSource variable
   Dts.Variables("User::MessageSource").Value = "Hi," & vbCrLf & _
   "This is a test mail to check Send Mail Task in SSIS!" & vbCrLf & vbCrLf & _
   "Thanks and Regards," & vbCrLf & "_____________" & vbCrLf & "Hari"
   Dts.TaskResult = ScriptResults.Success
End Sub
 
However, the message text can be a string that you provide, a connection to a file that contains the text, or the name of a variable (in our case) that contains the text.
 
STEP 5:
Drag and drop Send Mail Task and double click on it to open Send Mail Task Editor. Select Mail from Left side and set mail properties as shown below:
 
Thats all. We are done with Send Mail Task setup, this package will look like below snapshot. Just right click on package in Solution Explorer and Execute. Receiver will get an email as soon as package executes successfully. However, mail delivery depends on the response of SMTP Server as well.


Note:
  1. The To, Cc, and Bcc lines are limited to 256 characters.
  2. The SMTP connection manager supports only anonymous authentication and Windows Authentication.

Friday, July 23, 2010

Find Largest Size Tables in a Database

Below is the stored procedure to return largest tables of a database.

IF OBJECT_ID('sp_LargestTables' ,'P') IS NOT NULL
DROP PROC sp_LargestTables
GO
/***************************************************************
CREATE BY : Hari Sharma
PURPOSE : To get a list of tables according to their size.
***************************************************************/
CREATE PROC sp_LargestTables
(
   @n int = NULL,
   @IsSystemAllowed bit = 0
)
AS
BEGIN
   SET NOCOUNT ON
   DECLARE @LOW int
   SELECT @LOW = LOW
   FROM [master].[dbo].[spt_values] (NOLOCK)
   WHERE [number] = 1 AND [type] = 'E'

   IF @n > 0 SET ROWCOUNT @n
   SELECT TableName,[Row Count],[Size (KB)] FROM
   (
      SELECT QUOTENAME(USER_NAME(o.uid)) + '.' +
                     QUOTENAME(OBJECT_NAME(i.id))
         AS TableName
         ,SUM(i.rowcnt) [Row Count]
         ,CONVERT(numeric(15,2),
            (((CONVERT(numeric(15,2),SUM(i.reserved)) * @LOW) / 1024.0))) AS [Size (KB)]
      FROM sysindexes i (NOLOCK)
      INNER JOIN sysobjects o (NOLOCK)
         ON i.id = o.id AND
         ((@IsSystemAllowed = 1 AND o.type IN ('U', 'S')) OR o.type = 'U')
      WHERE indid IN (0, 1, 255)
      GROUP BY
         QUOTENAME(USER_NAME(o.uid)) + '.' +
         QUOTENAME(OBJECT_NAME(i.id))
   ) AS Z
   ORDER BY [Size (KB)] DESC

   SET ROWCOUNT 0
END
GO


How to use:

1. If you want all the user tables in the database with largest db size then:
EXEC sp_LargestTables [No Need to pass parameters]

2. If you want only 3 tables in the database with largest db size then:
EXEC sp_LargestTables 3

3. If you want only 20 tables in the database with largest db size including system tables then:
EXEC sp_LargestTables 20,1

Wednesday, July 21, 2010

Function to Split Multi-valued Parameters

How to split a comma seperated value?
Many times we need to write T-SQL statements to split a comma seperated value, however string is not necessarily to be comma seperated, it can be seperated by any delimiter e.g. comma (,), @, &, ; etc.

How to use Multi-valued Parameters of SSRS report in a Stored procedures?
One more question comes around, how to use a multi valued parameter of SSRS report in a Stored Procedure to filter report data? I am sure you can't use a multi valued parameter directly in T-SQL code without spliting multiple values, if you do so without spliting values, SPROC will throw an error.

To find the answer of above questions, you create a user defined function using below T-SQL code:

/**********************************************
CREATED BY HARI
PURPOSE : To split any multivalued string
seperated by any delimiter into multiple rows
***********************************************/
CREATE FUNCTION [dbo].[SplitMultivaluedString]
(
   @DelimittedString [varchar](max),
   @Delimiter [varchar](1)
)
RETURNS @Table Table (Value [varchar](100))
BEGIN
   DECLARE @sTemp [varchar](max)
   SET @sTemp = ISNULL(@DelimittedString,'')
                + @Delimiter
   WHILE LEN(@sTemp) > 0
   BEGIN
      INSERT INTO @Table
      SELECT SubString(@sTemp,1,
             CharIndex(@Delimiter,@sTemp)-1)
     
      SET @sTemp = RIGHT(@sTemp,
        LEN(@sTemp)-CharIndex(@Delimiter,@sTemp))
   END
   RETURN
END
GO

/* How to use this function:
-----------------------------------------
SELECT * FROM [dbo].[SplitMultivaluedString] ('1,2,3,4', ',')
SELECT * FROM [dbo].[SplitMultivaluedString] ('1;2;3;4', ';')
SELECT * FROM [dbo].[SplitMultivaluedString] ('Hari#Thomas','#')
*/

Sunday, July 18, 2010

Report Parameters in SSRS 2008

What is Report Parameters in SSRS?
In SSRS, parameters are used to specify the data to use in a report, narrow down your report data for better analysis, connect related reports together, and vary report presentation. Report parameters can be Single-Valued and Multivalued.

Using Parameters in Reporting Services:
The most common use of parameters is to vary report data retrieved by dataset queries. In this scenario, users are prompted for a value or values when they run the report, and the dataset query retrieves only the data that is requested. You can change the report parameter properties in the report design tools to include a valid values list that displays at run time.

You can also create cascading parameters, which retrieve hierarchical data from a data source. I'll explain cascading parameters in my nect post. First I want to explain creating a report parameter in SSRS 2008.

Below are the uses of report parameters:
  • To Control Report Data - by selecting required parameters values to filter the report data.
  • To Control Report Appearance - use parameters to change report appearance using expression-based properties, including conditionally hiding report items and conditionally changing text color.
  • To Connect to Other Reports - use parameters to link to drillthrough reports, subreports, and linked reports.
  • To Select Specific Data Columns - parameters can be used to select specific columns of a table/matrix at run time.
How to create Report Parameters:
Query parameters are added to a dataset query by way of the query designers or the Dataset Properties dialog box. After you create a query with parameters, Reporting Services automatically links query parameters to report parameters with the same name. Below are the steps to create parameters:

STEP 1:
To begin, start a new Report Server Project project in Visual Studio 2008 by clicking on Start --> All Programs --> SQL Server 2008 --> SQL Server Business Intelligence Development Studio. Then, from the menu, select File --> New --> Project to open New Project wizard. Now select Report Server Project from Visual studio installed templates and specify Name, Location and Solution Name.

I'll use the solution ctreated in my previous article. I'll use FirstReport.rdl for this example and I'll create a parameter Designation to filter report data for selected designations.

STEP 2:
Create a new Data Set for the report parameter. I will add a dataset dsDesignation for Employee's Designation using query
SELECT DISTINCT Desg AS Designation FROM Employee
as shown below:


STEP 3:
Now I will add a parameter Designation. In Report Data section, right click on Parameters node and click Add Parameter... as shown below:


STEP 4:
In Report Parameter Properties window, enter Name and Prompt of the parameter and select the Data type from dropdown box. For our example, enter Designation in Name and Prompt text boxes and select Text as data type.


STEP 4:
Now click on Avaliable Values to set available values for the parameter. Select Get values from a query. Select dsDesignation as Dataset, Designation as Value field and Label field.


STEP 5: Click on Default Values, Select Get values from a query. Select dsDesignation as Dataset, Designation as Value field. Click OK to save changes.


STEP 6:
Double click on your main dataset (dsMain) to open Dataset Properties. Now Select  Parameters and click on Add button to map Designation parameter.

STEP 7:
Now final step, just add parameter in your query as shown in below snapshot:
WHERE [Desg] = @Designation


Now preview the report to check the action of parameter used:


Note: This article describes onlu about single valued parameter. I'll explain multi-valued parameter in my next article.

Tuesday, July 13, 2010

First Report in SSRS 2008

In this article, I will explain how to create a simple report (that could be first report for a newbie) using SSRS 2008. Here I am assuming that you have successfully installed SQL Server 2008 along with SSRS.

There are two ways to create Reports in SSRS. You can develop the report manually, or you can use the Report Wizard to give yourself a head start. For this first report, I am going to take advantage of the wizard.

STEP 1:
To begin, start a new Business Intelligence project in Visual Studio 2008 by clicking on Start --> All Programs --> SQL Server 2008 --> SQL Server Business Intelligence Development Studio. Then, from the menu, select File --> New --> Project to open New Project wizard. Now select Report Server Project from Visual studio installed templates and specify Name, Location and Solution Name. I am specifying these ReportProjectSSRS, D:\Hari, and ReportProjectSSRS respectively as shown below:


STEP 2:
In Solution Explorer, right click on Reports folder and select Add New Report. This will open Report Wizard. Click Next on the Welcome screen and this will bring you to the Select the Data Source screen.


STEP 3:
Enter the name of Data Source as dsLocal and select type as Microsoft SQL Server. Now click on Edit button to set the connecting string for data source, this will open Connection Properties window. Enter Server name and database name and click on Test Connection buttion to make sure the connection is established. Click OK button twice to close Test Results and Conection Properties windows.


You can check the Make this a shared data source checkbox to make this data source as shared so that it can be used for other reports as well. Now click on Next to proceed.


STEP 4:
This will open Design the Query wizard. Here you can define your Query string. Alternatively you can use Query Builder... to build your query. I will use below query to pull data from Employee table:

SELECT
   [Emp_code],[Emp_Name],[Desg],
   [Head],[DOB],[Basic],[Dept_Code]
FROM Employee (NOLOCK)
 
Click Next to proceed. It will display Select the Report Type wizard. Select Tabular option and click Next to proceed.
 
STEP 5:
Now you can see Design the Table wizard. Select required fields from Available fields and clicked on details button to make these fields available in details part of a report. You can do data grouping as well using Group button. Click Next to proceed.


STEP 6:
Now you can see Choose the Table Style wizard. Select default style Slate and click Next. Finally you can see Completing the Wizard. Enter report name FirstReport and click Finish to complete the wizard.


Thats all. We are done with our First report in SSRS 2008. Report at design time will look like one shown below:


Click on Preview to generate the report:

Friday, July 9, 2010

Dynamic Database Connection using SSIS ForEach Loop Container

Did you ever come across a requirement where you have to run the same SQL statement(s) in multiple database server/instances using SSIS?

Many of my friends have asked about how to connect through multiple Databases from different Server using single Dynamic Connection. I want to explain this feature in this article. Basically, I want to execute one query (to calculate Record Counts for a given table) on a set of servers (which can be Dev, Test,UAT, PreProduction and Production servers). In my example, I am using ForEach Loop to connect to the servers one by one--> Execute the Query --> Fetch and store the data.

So here is the approach:
  • Create a Table in your local database (whatever DB you want) and load all the connection strings. Within SSIS package, use Execute SQL Task to query all the connection strings and store the result-set in a variable of object type.
  • Use ForEach Loop container to shred the content of the object variable and iterate through each of the connection strings.
  • Place an Execute SQL task inside ForEach Loop container with the SQL statements you have to run in all the DB instances. You can use Script Task to modify your query as per your need.


Below is the details with an example:

STEP1:
To begin, Create two tables as shown below in on of the environment:

-- Table to store list of Sources
CREATE TABLE SourceList (
   ID [smallint],
   ServerName [varchar](128),
   DatabaseName [varchar](128),
   TableName [varchar](128),
   ConnString [nvarchar](255)
)

GO

-- Local Table to store Results
CREATE TABLE Results(
   TableName  [varchar](128),
   ConnString [nvarchar](255),
   RecordCount[int],
   ActionTime [datetime]
)
GO

STEP 2:
Insert all connection strings in SourceList table using below script:
INSERT INTO SourceList

SELECT 1 ID,
'(local)' ServerName, --Define required Server
'TestHN' DatabaseName,--Define DB Name
'TestTable' TableName,
'Data Source=(local);Initial Catalog=TestHN;Provider=SQLNCLI10.1;Integrated Security=SSPI;Auto Translate=False;' ConnString
 
Insert as many connections as you want.
 
STEP 3:
Add new package in your project and rename it with ForEachLoopMultipleServers.dtsx. Add following variable:
 
VariableTypeValuePurpose
ConnStringStringData Source=(local);
Initial Catalog=TestHN;
Provider=SQLNCLI10.1;
Integrated Security=SSPI;
Auto Translate=False;
To store default connection string
QueryStringSELECT '' TableName,
N'' ConnString,
0 RecordCount,
GETDATE() ActionTime
Default SQL Query string.
This can be modified at runtime based on other variables
SourceListObjectSystem.ObjectTo store the list of connection strings
SourceTableStringAny Table Name.
It can be blank.
To store the table name of current connection string.
This table will be queried at run time

STEP 4:
Create two connection managers as shown below:
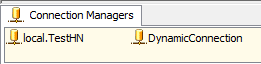

Local.TestHN: For local database which has table SourceList. Also this will be used to store the result in Results table.
DynamicConnection: This connection will be used for setting up dynamic connection with multiple servers.
Now click on DynamicConnection in connection manager and click on ellipse to set up dynamic connection string. Map connection String with variable User::ConnString.

STEP 5:
Drag and drop Execute SQL Task and rename with "Execute SQL Task - Get List of Connection Strings". Now click on properties and set following values as shown in snapshot:
Result Set: Full Result Set
Connection: Local.TestHN
ConnectionType: Direct Input
SQL Statement: SELECT ConnString,TableName FROM SourceList

Now click on Result Set to store the result of SQL Task in variable User::SourceList.

STEP 6:
Drag and drop ForEach Loop container from toolbox and rename with "Foreach Loop Container - DB Tables". Double click on ForEach Loop container to open Foreach Loop Editor. Click on Collection  and select Foreach ADO Enumerator as Enumerator. In Enumerator configuration, select User::SourceList as ADO object source variable as shown below:

STEP 7: Drag and drop Script Task inside ForEach Loop container and double click on it to open Script Task Editor. Select User::ConnString,User::SourceTable as ReadOnlyVariables and User::Query as ReadWriteVariables. Now click on Edit Script button and write following code in Main function:

public void Main()

{
   try
   {
      String Table = Dts.Variables["User::SourceTable"].Value.ToString();
      String ConnString = Dts.Variables["User::ConnString"].Value.ToString();
      MessageBox.Show("SourceTable = " + Table + "\nCurrentConnString = " + ConnString);
      //SELECT '' TableName,N'' ConnString,0 RecordCount,GETDATE() ActionTime
      string SQL = "SELECT '" + Table + "' AS TableName, N'" + ConnString + "' AS ConnString, COUNT (*) AS RecordCount, GETDATE() AS ActionTime FROM " + Dts.Variables["User::SourceTable"].Value.ToString() + " (NOLOCK)";

      Dts.Variables["User::Query"].Value = SQL;
      Dts.TaskResult = (int)ScriptResults.Success;
   }
   catch (Exception e)
   {
      Dts.Log(e.Message, 0, null);
   }
}
 
STEP 8:
Drag and drop Data Flow Task and double click on it to open Data Flow tab. Add OLE DB Source and Destination. Double click on OLE DB Source to configure the properties. Select DynamicConnection as OLE DB connection manager and SQL command from variable as Data access mode. Select variable name as User::Query. Now click on columns to genertae meta data.

Double click on OLE DB Destination to configure the properties. Select Local.TestHN as OLE DB connection manager and Table or view - fast load as Data access mode. Select [dbo].[Results] as Name of the table or the view. now click on Mappings to map the columns from source. Click OK and save changes.
Finally DFT will look like below snapshot:

STEP 9: We are done with package development and its time to test the package.
Right click on the package in Solution Explorer and select execute. The message box will display you the current connection string.
 Once you click OK, it will execute Data Flow Task and load the record count in Results table. This will be iterative process untill all the connection are done. Finally package will execute successfully.


You can check the data in results table:
Here is the result:

SELECT * FROM SourceList


SELECT * FROM Results

Monday, July 5, 2010

Creating Shared Data Source in SSRS 2008

In this post, I'll explain how to create a Shared Data Source in SSRS 2008 with an example.

We need Data Source while developing reports in Report Designer and Report Builder tools. For this example, I will be using SQL Server Business Intelligence Development Studio 2008.

To begin, I'll create a new Report Server Project.

Create Report Server Project

1. Open BIDS: Click on Start --> All Programs --> SQL Server 2008 --> SQL Server Business Intelligence Development Studio as shown below:


2. From the menu bar, select File --> New --> Project...

3. Select Report Server Project template from New Project wizard as shown below:
4. Click OK to complete the wizard.

Create Shared Data Source
Follow below steps to create a shared data source:
1. In the Solution Explorer pane, right click on Shared Data Sources folder --> click on Add New Data Source. This will open Shared Data Source Properties dialog.
2. Enter Data Source name in Name textbox (in our example its dsTestHN) and Type as Microsoft SQL Server. Click on Edit button to set connection string.


3. Enter Server name and Database name from dropdown boxes. Finally click on Test Connection to check the connection, You should receive Test connection succeeded message.

4. Click OK to complete and save changes. Now you can see dsTestHN data source in Solution Explorer pane as shown below:
That's all! We have successfully created a Shared Data Source.

Click here to understand about Data Sources Supported by Reporting Services.

Friday, July 2, 2010

Types of SSRS Reports

We can create different kind of reports using Reporting Services. This article describes the terminology used for the various types of reports and the ways reports can be created and then used. A single report can have multiple characteristics e.g. snapshot reports can be parameterized, ad hoc reports incorporate clickthrough report, and subreports can be linked reports.

With Reporting Services, we can create following types of reports:
  • Parameterized reports
  • Linked reports
  • Snapshot reports
  • Cached reports
  • Ad hoc reports
  • Drilldown reports
  • Drillthrough reports
  • Subreports
Parameterized reports: A parameterized report uses input parameter to complete report processing. With a parameterized report, you can filter report data based on the values that are set at run time. Parameterized reports are frequently used for filtering reports data.

Linked reports: A linked report is a report that provides an access to an existing report. It is similar to a hiperlink that we use to open a page. A linked report is derived from an existing report and retains the original report definition. We can create a linked report on the report server when we want to create additional versions of an existing report. We can create linked reports whenever we want to deploy an existing report with different settings.

Snapshot reports: A snapshot report contains query results that were retrieved at a specific time. Unlike on-demand reports, which get up-to-date query results when we run the report, snapshots reports are processed on a schedule and then saved to Report Server. When we select a report snapshot to view, Report Server retrieves the stored report from the report server database and shows the data and layout that were captured for the report at the time the snapshot was created.
Report snapshots serve three purposes:
  1. Report history - by creating a series of report snapshots, we can build a history of a report that shows data changes over time.
  2. Consistency - use report snapshots when you want to provide consistent results for multiple users who must work with identical sets of data. With volatile data, an on-demand report can produce different results from one minute to the next.
  3. Performance - by scheduling large reports to run during off-peak hours, we can reduce processing impact on the Report Server during core business hours.
Cached reports: A cached report is a saved copy of a processed report. These reports are used to improve performance by reducing the number of processing requests to the report processor and by reducing the time required to retrieve large reports.

Ad hoc reports: An ad hoc report can be created from an existing Report Model using Report Builder. Ad hoc reports refer specifically to Report Builder reports. Ad hoc reports leverage report models and pre-defined templates to enable information workers to quickly and easily explore business data using familiar terminology and data structures that have been implemented in the report model. Ad hoc reports can be saved and run locally or published to a report server, just like other Reporting Services reports.

Drilldown reports: Drilldown reports initially hide complexity and enable the user to toggle conditionally hidden report items to control how much detail data they want to see. Best example of Drilldown report is Sale information for the Year, then drill down for Quarters followed by Months and week. Other example is Sale by Region then drilldown by Countries followed by State and Cities.

Drillthrough reports: Drillthrough reports are standard reports that are accessed through a hyperlink on a report item in the original report. Drillthrough reports work with a main report and are the target of a drillthrough action for a report item such as placeholder text or a chart. The main report displays summary information, for example in a matrix or chart. Actions defined in the matrix or chart provide drillthrough links to reports that display greater details based on the aggregate in the main report. Drillthrough reports can be filtered by parameters.

Subreports: A subreport displays another report inside the body of a main report. A subreport is used to embed a report within another report. Any report can be used as a subreport. The subreport can use different data sources than the main report. We can set up the parent report to pass parameters to the subreport. Although a subreport can be repeated within data regions using a parameter to filter data in each instance of the subreport, subreports are typically used with a main report as a briefing book or as a container for a collection of related reports.

Thursday, July 1, 2010

SSRS 2008 New features

Following are the important New Features in SSRS 2008:
  • Reports can be build from different data sources e.g. SQL Server, Oracle, DB2, SQL Azure, PowerPoint Workbooks, SAP NetWeaver BI, Hyperion Essbase, and others.
  • Better reports visualization by viewing data graphically, leveraging a wealth of new rich mapping, gauge and charting capabilities. SSRS 2008 support for maps and geospatial visualizations with integration to Bing maps and support for SQL spatial data types
  • Additional visualizations including indicators, sparklines and data bars
  • Support for consuming SharePoint lists and PowerPivot models as data sources.
  • Support for Madison and SQL Azure data sources
  • Render any report as a data source to PowerPivot or other applications through ATOM data feeds.
  • New data representation format of TABLIX control which has features of both Table and Matrix. We can use a tabular format for fixed data reports and Matrix format for dynamic crosstab reports; or combine the two formats by using the Tablix.
Reference: BOL. Click here for more information about new features of SQL Server 2008 Reporting Services.